


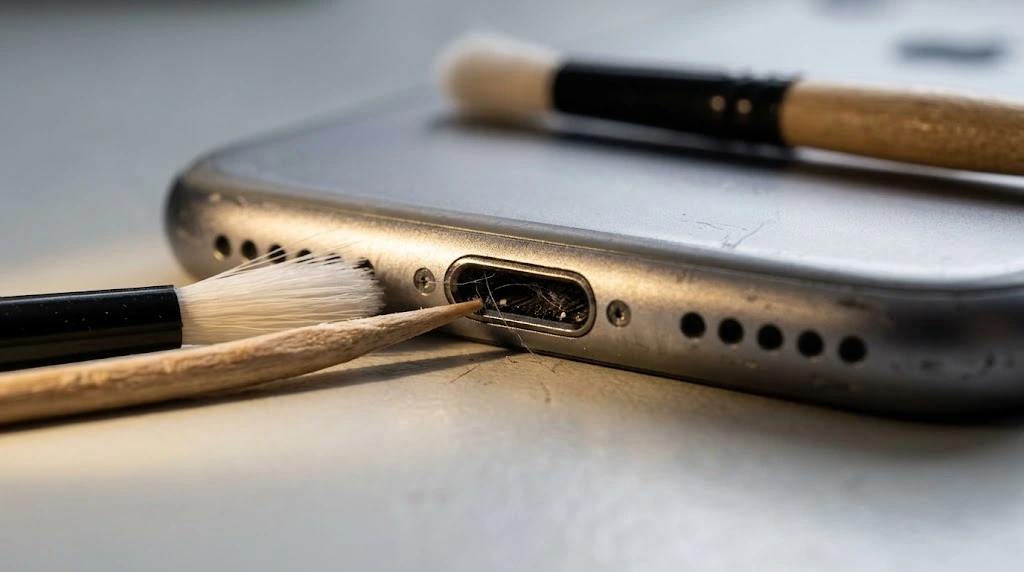
Does your cable feel loose, or does your iPhone charge on and off? Lint is often the cause. Knowing how to clean iPhone charging port takes about five minutes, and it fixes the problem more often than you’d think. This guide is for beginners, so you’ll see exactly what to use and what to avoid.
Signs Your iPhone Charging Port Needs Cleaning
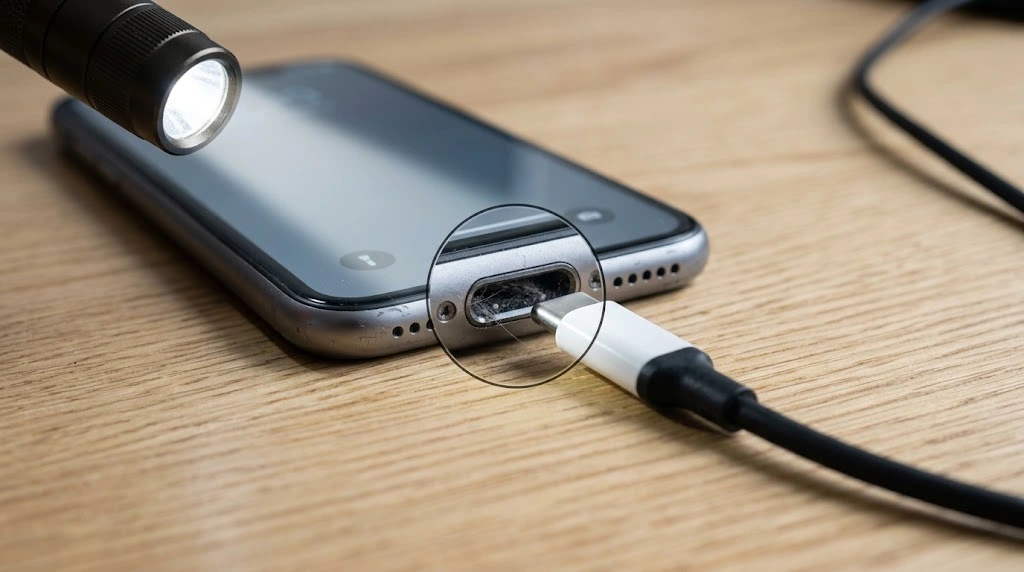
Your port collects dust and pocket lint every day. Over time, that debris packs into the bottom of the port and stops the cable from sitting all the way in.
Slow or on-and-off charging
If charging starts, stops, then starts again, the connection is probably weak. A cable that doesn’t fully click in is the biggest warning sign.
Your cable feels loose
A clean port holds the plug firmly. If it wiggles or slips out easily, check for debris first.
You can see dirt inside
Shine a flashlight into the port. Gray fuzz or dark packed lint means it’s time to clean.
A “Liquid Detected” alert appears
This alert is about moisture, not lint. Don’t clean while it’s showing. Skip to the moisture section below.
Quick check: Try a different cable and a different charger first. If another cable works fine, your original cable is the problem, not the port. See our guide on iPhone not charging fixes for the full list.
What You Need Before You Start
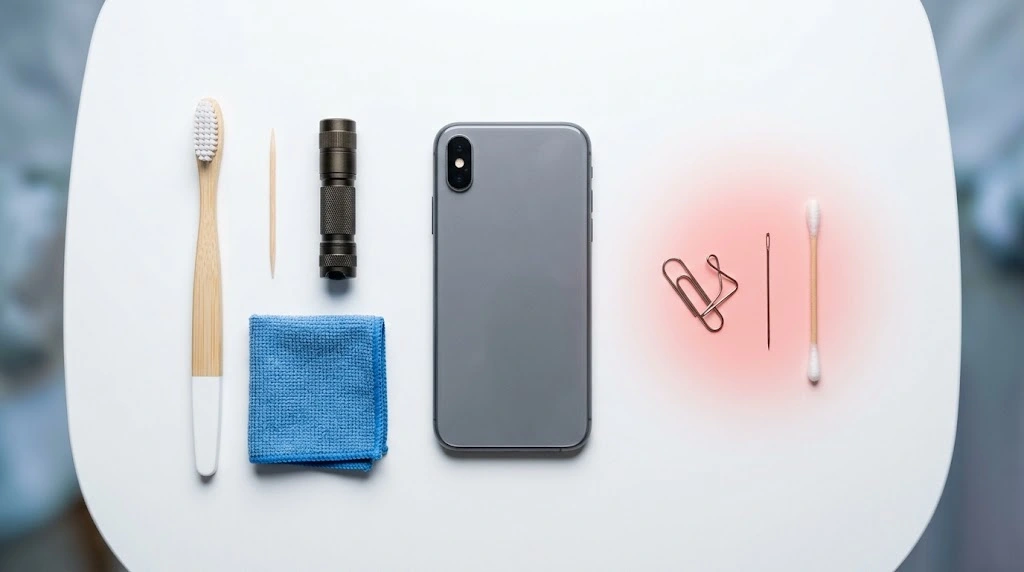
You don’t need special tools. Most people already have everything at home.
Safe tools:
- A small, soft-bristled brush (a new, clean toothbrush works)
- A wooden or plastic toothpick (optional, for stubborn lint)
- A flashlight (your second phone’s light works)
- A microfiber cloth for the outside of the phone
Tools to avoid:
- Metal pins, paper clips, SIM ejector tools, or needles
- Cotton swabs (they leave fibers behind)
- Liquids, sprays, or cleaning wipes inside the port
- Compressed air cans, since Apple advises against using them to clean its devices
How to Clean iPhone Charging Port in 6 Steps
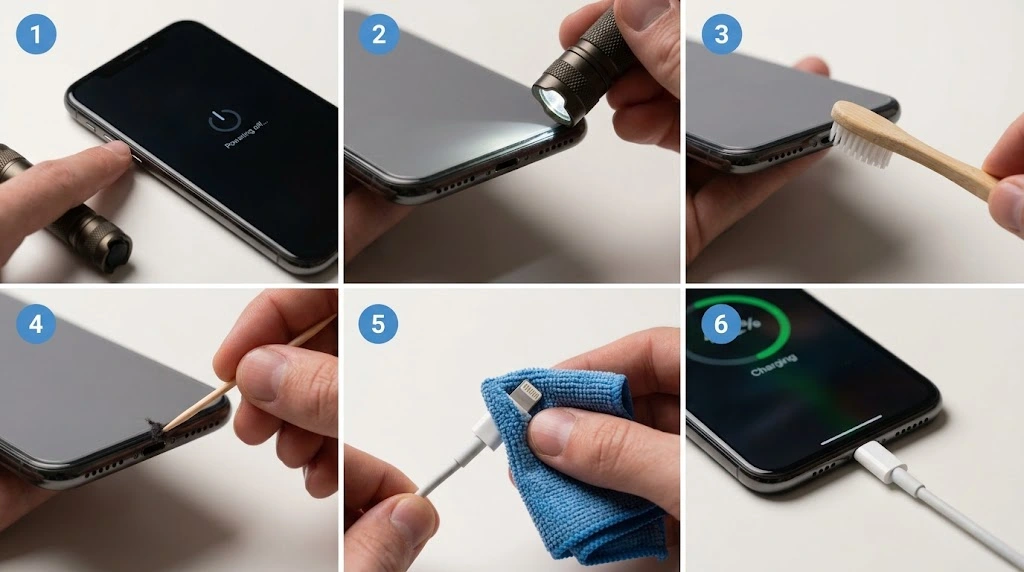
Take your time. The pins inside are small and delicate.
Step 1: Turn off your iPhone
Power it down and unplug every cable. Never clean the port while the phone is on or charging.
- Face ID iPhones: Hold the Side button and either Volume button, then slide to power off.
- iPhone SE and older models with a Home button: Hold the Side (or Top) button, then slide to power off.
Need help? Follow our guide on how to turn off your iPhone.
Step 2: Look inside with a flashlight
Hold the phone with the port facing you. Shine the light straight in. You’re looking for packed lint, dust, or anything stuck at the bottom.
Step 3: Loosen the lint with a soft brush
Gently brush along the sides of the port. Use light, short strokes. Brushing first loosens debris so it comes out easier.
Step 4: Remove packed debris with a toothpick
Only do this if lint is still visible. Tilt the phone so the port faces down. Slide the toothpick along the inside walls, never pressing into the center or the pins.
- Scrape lightly, then lift the lint out.
- Stop if you feel resistance.
- Don’t twist or pry.
Safety tip: The contact pins sit inside the port. A hard push can bend them, and then the phone may not charge at all. If you’re nervous, skip this step and ask a repair shop to do it.
Step 5: Wipe the plug end of your cable
Dirt travels both ways. Wipe the metal end of your charging cable with a dry microfiber cloth. If it looks dirty or bent, try a different cable.
Step 6: Test the connection
Power your iPhone back on, then plug in the cable. It should click in firmly. Look for the charging icon, or the lightning bolt on your battery, within a few seconds.
Lightning vs USB-C: What’s Different?
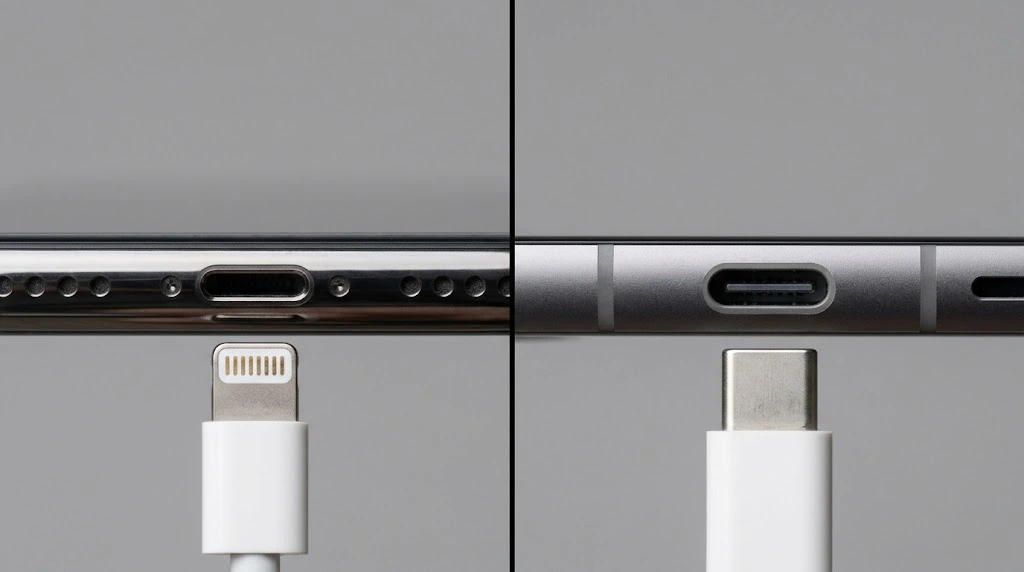
iPhone 15 and later models use USB-C. Older models use Lightning. The cleaning method is the same, but the ports are shaped differently.
| Feature | Lightning port | USB-C port |
|---|---|---|
| Used on | iPhone 14 and earlier, iPhone SE (3rd gen) | iPhone 15 and later |
| Port shape | Narrow, rounded | Wider, oval |
| Lint buildup | Packs tightly at the bottom | Collects on the center tongue’s edges |
| Best tool | Soft brush, then toothpick | Soft brush, then plastic toothpick |
| Main risk | Bending pins | Damaging the center tongue |
USB-C tip: Avoid pressing on the thin center tongue in the middle of the port. It’s fragile. Brush around it, not on it.
What Not to Do When Cleaning Your iPhone Charging Port
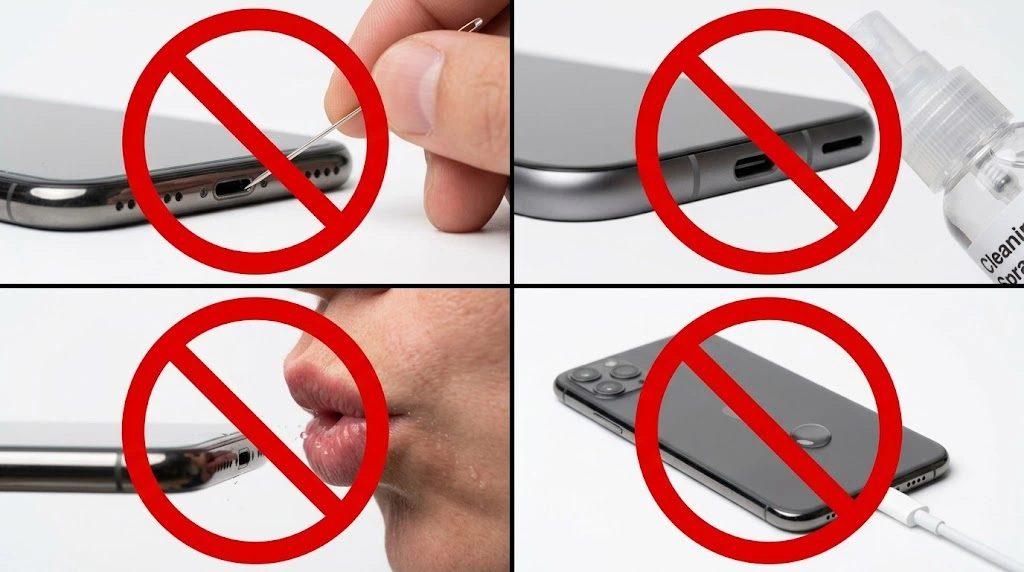
Most damage happens during cleaning, not before it.
Don’t use metal objects
Metal can scratch the contacts or short-circuit the phone. A paper clip is the most common mistake.
Don’t pour liquids into the port
Water and cleaning sprays can cause real damage. If you must use alcohol on a tool, apply a tiny amount to a cloth, let it dry, and keep it outside the port.
Don’t blow into the port with your mouth
Your breath adds moisture. It also pushes debris deeper.
Don’t charge a wet phone
If your iPhone shows a Liquid Detected alert, unplug it. Let it dry in open air for a while, away from heat. Don’t use rice, because small grains can get stuck in the port.
Still Not Charging After Cleaning?
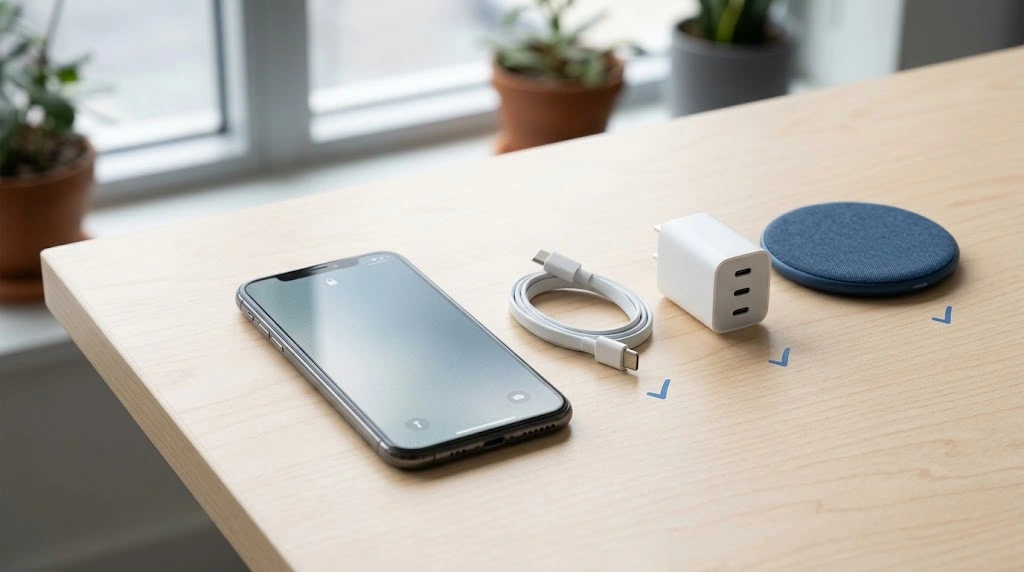
Don’t worry. Work through this short checklist.
Check the cable and charger
Use an Apple cable or an MFi-certified one. Try a different wall adapter and outlet too. More options are in our iPhone 16 charger guide.
Restart your iPhone
A software glitch can mimic a port problem. Follow our guide on how to restart your iPhone.
Try wireless charging
If your iPhone charges wirelessly but not with a cable, the port is most likely the issue. If neither works, the battery may be to blame. Check it with our battery health guide.
Know when to get help
Contact Apple or a repair shop if:
- The port looks bent or damaged
- You see rust or green residue
- The phone is hot while charging
- The “Liquid Detected” alert keeps coming back
Before you book, check your coverage with our iPhone warranty check. Then find a shop through our iPhone repair near me guide, or read about battery replacement if your battery is old.
For official steps, see Apple Support: If your iPhone won’t charge on support.apple.com, and Apple’s repair page. Another useful reference is iFixit’s Lightning port cleaning guide.
How to Keep Your Charging Port Clean
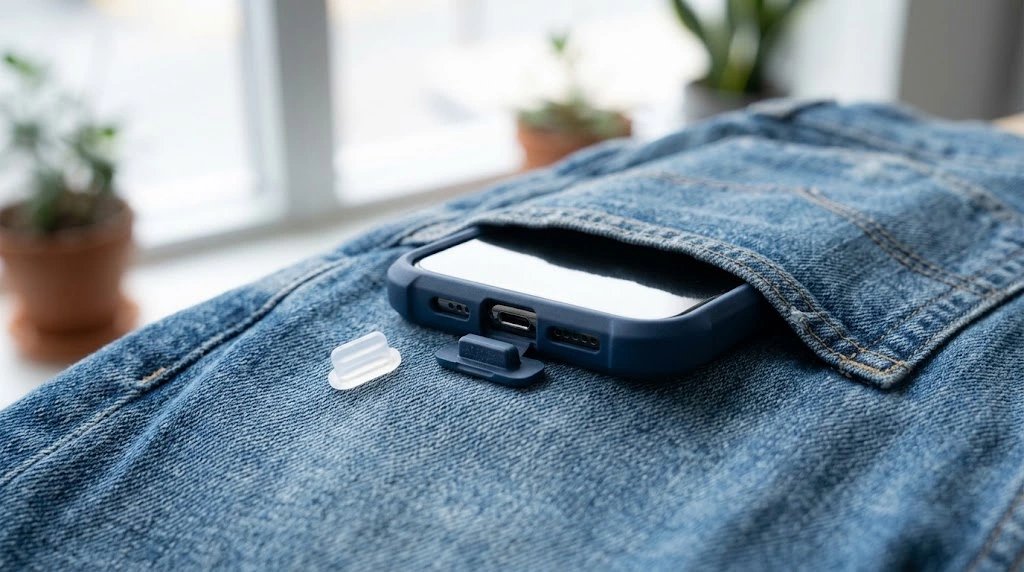
A few small habits prevent most buildup.
- Pocket your phone port-up so lint falls away from it.
- Use a case with a port cover or a small dust plug.
- Avoid carrying it loose with keys, coins, or tissues.
- Clean the port every few months, or sooner if the cable feels loose.
- Don’t force the plug in. Gentle pressure is enough.
FAQ: How to Clean an iPhone Charging Port
Can I clean my iPhone charging port with a toothpick?
Yes, if it’s wooden or plastic and you use it gently. Apple’s own guidance points to a soft brush first. Use the toothpick only on stubborn lint, along the inside walls.
Is compressed air safe for an iPhone charging port?
It’s best to skip it. Apple advises against compressed air for cleaning its devices, since the pressure can push debris deeper or force moisture inside.
Can I use rubbing alcohol to clean my iPhone charging port?
Avoid putting liquid in the port. Use a dry brush instead. If something sticky is stuck inside, a repair shop is the safer choice.
How often should I clean my iPhone charging port?
There’s no fixed schedule. Every two to three months is a good habit, or whenever your cable feels loose or charging gets slow.
Why does my iPhone charge slowly even after cleaning the port?
The cause may be a worn cable, a weak adapter, or an aging battery. Try another cable and charger, then check your battery health.
Conclusion
Now you know how to clean iPhone charging port safely, step by step. Power off the phone, look inside, brush gently, remove stubborn lint with a toothpick, and test the cable. Avoid metal and liquids, and ask a pro if you see damage.
Give it a try today. It takes five minutes and can save you a repair bill. Still stuck? Read our iPhone not charging guide next.

